
Objective
In this document we will describe how to configure SSL, modifying from a self-signed key to a valid certificate (free) using a CA (Certificate Authorities), avoiding the previous messages.
If you are running a bigger production environment, with many users, you will prefer to get a key from a company like VeriSign (must be bought), so the root key comes as a standard on browsers, no need to import it manually on each user’s browser.
This document will be used also as a starting point to troubleshoot the SSL connections.
Target audience
This document is intended for the use of OpMon administrators with a practical knowledge of how to configure and use Linux and Apache. Administrators need to be familiarized with text editors like Vim and configuration files.
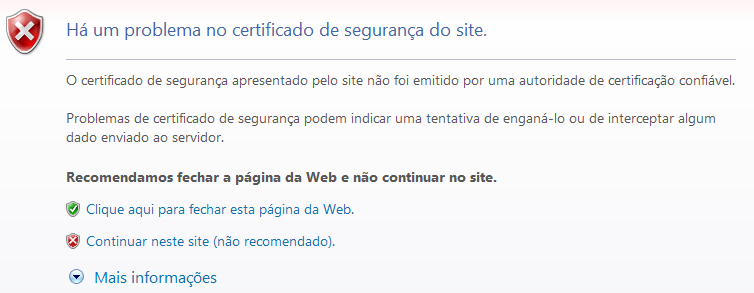
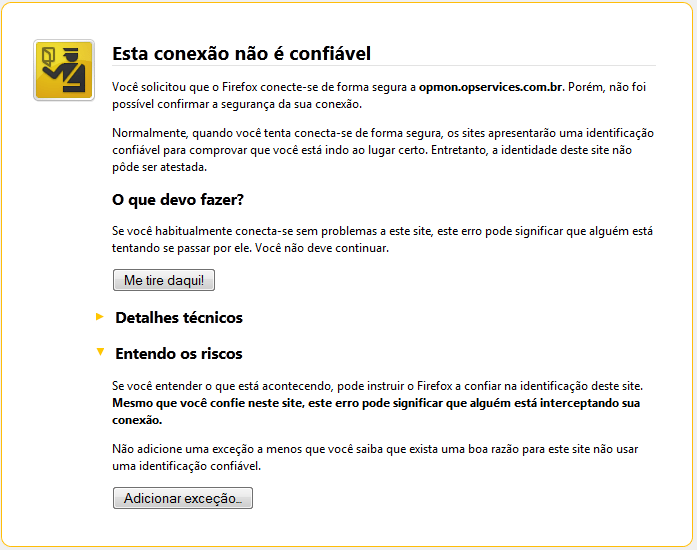
For smaller uses, the self-signed SSL keys, but keep on generating alerts on browsers, as shown on the image below.
IE9 (exemplo de alerta)
Firefox 14.0.1 1 (Alert example)
Solution
1) Prerequisites
Have an account on CAcert (http://www.cacert.org).
The name must be registered on the client DNS, tipo opmon.www.opmonstartup.com, opmon.tokstok.net.br, or other.
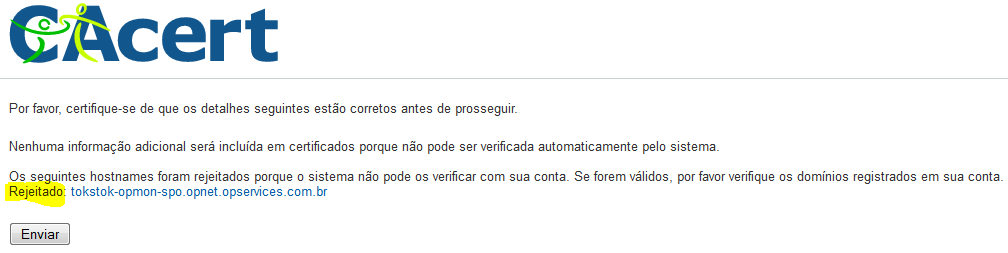
OpMon must be externally accessible on the TCP 443 port, not only for OpServices, but for CAcert to validate the certificate. Otherwise will be shown the following message, displaying that was rejected.
2) Generating a key
First thing to do is to generate a key. For that, enter OpMon through SSH and follow the next steps:
a) Enter the standard directory for Apache configuration.
[root@opmon]# cd /etc/httpd/conf.d
b) Creating a private key.
[root@opmon]# openssl genrsa -out opmon.key 2048
Generating RSA private key, 2048 bit long modulus
..........................+++
......................................................+++
e is 65537 (0x10001)
c)Creating a CSR certificate (Certificate Signing Request). Note that the items marked in red must correspond with the client where is being generated the certificate, can’t be used the information below on other client. Preferably use the client’s DNS hostname, as was mentioned on the pre requisites.
[root@opmon conf.d]# openssl req -new -key opmon.key -out opmon.csr
You are about to be asked to enter information that will be incorporated
into your certificate request.
What you are about to enter is what is called a Distinguished Name or a DN.
There are quite a few fields but you can leave some blank
For some fields there will be a default value,
If you enter '.', the field will be left blank.
-----
Country Name (2 letter code) [GB]:BR
State or Province Name (full name) [Berkshire]:RS
Locality Name (eg, city) [Newbury]:Porto Alegre
Organization Name (eg, company) [My Company Ltd]:OpServices S.A.
Organizational Unit Name (eg, section) []:OPERACAO
Common Name (eg, your name or your server's hostname) []:opmon.opservices.com.br
Email Address []:email@opservices.com.br
Please enter the following 'extra' attributes
to be sent with your certificate request
A challenge password []:opservices
An optional company name []:OpServices
3) Obtaining the SSL Certificate
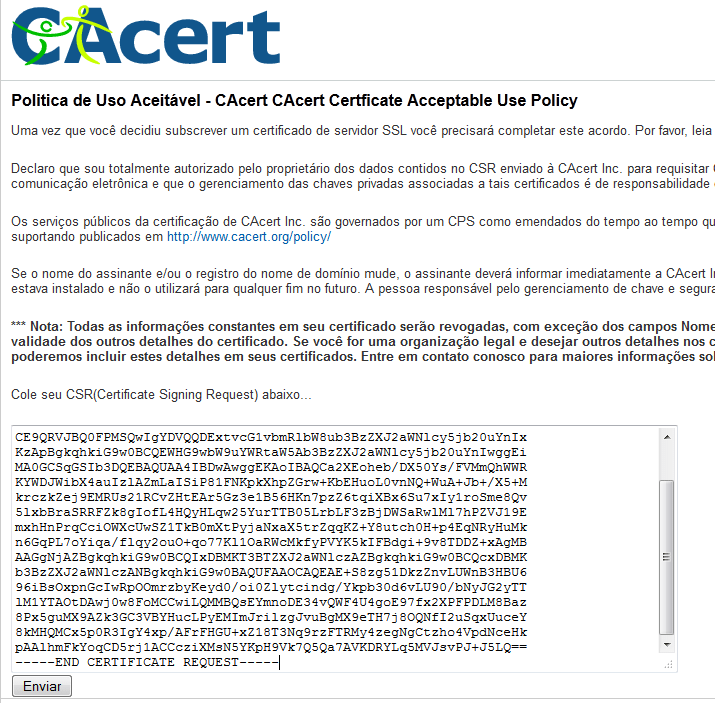
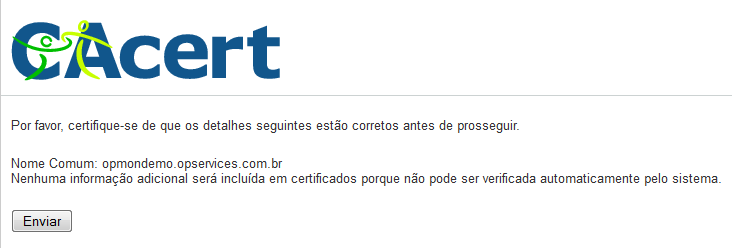
Enter the url https://www.cacert.org/account.php?id=10, paste all the content of the newly created key opmon.csr, and click on the button “Send”, as shown on the image below.
If everything is OK, must appear an information approximately like this, confirm the data and click “Send”.
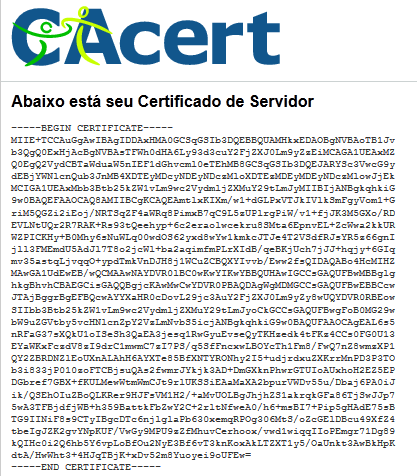
The result will be the server valid certificate, as shown on the following example. Copy the content of the encrypted certificate and paste on a new file /etc/httpd/conf.d/opmon.crt
4)Configuring the Certificate on OpMon
Edit the file /etc/httpd/conf.d/ssl.conf and modify the entries as shown below.
SSLCertificateFile /etc/httpd/conf.d/opmon.crt
SSLCertificateKeyFile /etc/httpd/conf.d/opmon.key
After that restart the Apache, if everything is OK, must appear the next messages.
[root@conf.d]# service httpd restart
Stopping httpd:                                  [  OK  ]
Starting httpd:                                  [  OK  ]
All set, what now?
After completing the process of server configuration, it is necessary to install the certificate on the browser, in case there isn’t a CA from CAcert yet, and click here to learn more.