Objective
This post has the objective to describe how the display rule of OpMon’s colors works
About the Colors
From OpMon version 8, it will more visually represent the states of the elements, giving a clearer and more objective visibility regarding the status of the monitored elements.
Now, each of the monitoring states have specific colors, as well as the recognition and maintenance actions that are taken, to know which monitoring statuses, just click here.
The colors reflect directly on the list of elements (status grid), reports and dashboards, allowing a faster identification of the elements.
For better illustrating the level of criticality, we can illustrate the following order of priority, where on the bottom we have the least critical states, going to the top where we have the most critical elements.

In OpMon the color area and color legend can be viewed through the settings area. To do this, simply put your mouse coursor over the “Tools” module and then click on “Configurations”:

Then just click on “Colors”, located in the shortcuts area, to visualize the color area and their respective captions.
It is important to emphasize regarding the order of display, that from the use of colors, will make clearer the action that is being taken for each case.
For example, for the incidents (elements in state not “OK”) whose no action was taken yet, we will can view the following colors.

By recognized Incidents we consider all the elements where actions were included, that is, whenever any action is included for a given element, it will be quickly identified by its respective color.

We will have the following color to identify the elements that has Scheduled Downtime:

And the color of the OK status indicates that the element, be it host or service, is healthy and does not require any interference.

Modifying colors
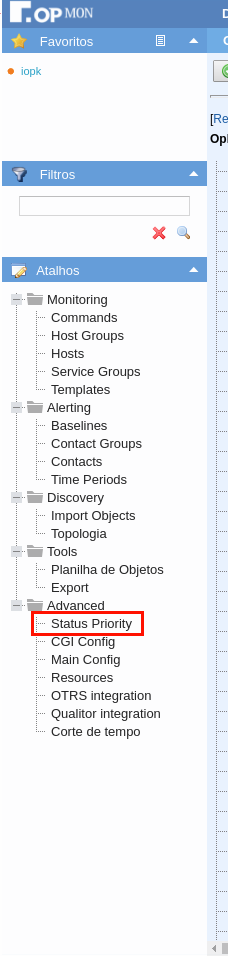
In OpMon it is possible to change the colors of the states. To do this, simply place your mouse over the “Tools” module and then click on “Configurations”:
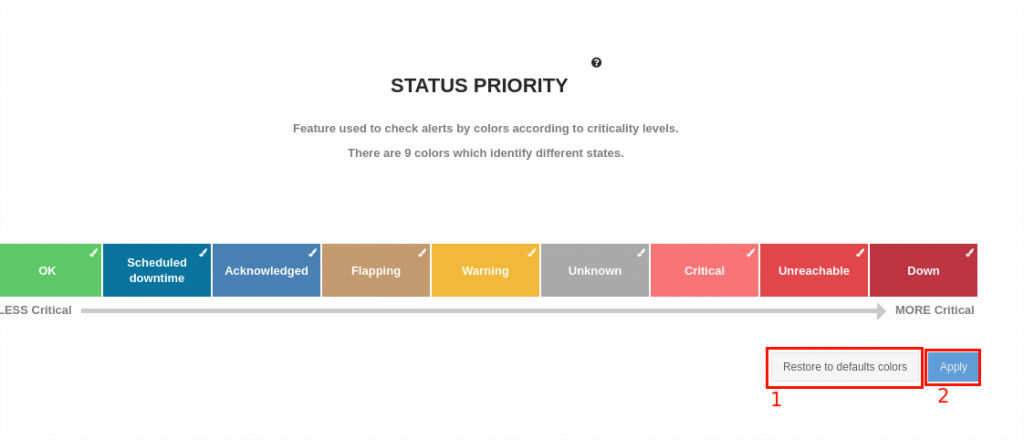
Then just click on “Status priority”, located in the shortcuts area, to visualize the color area and their respective captions.
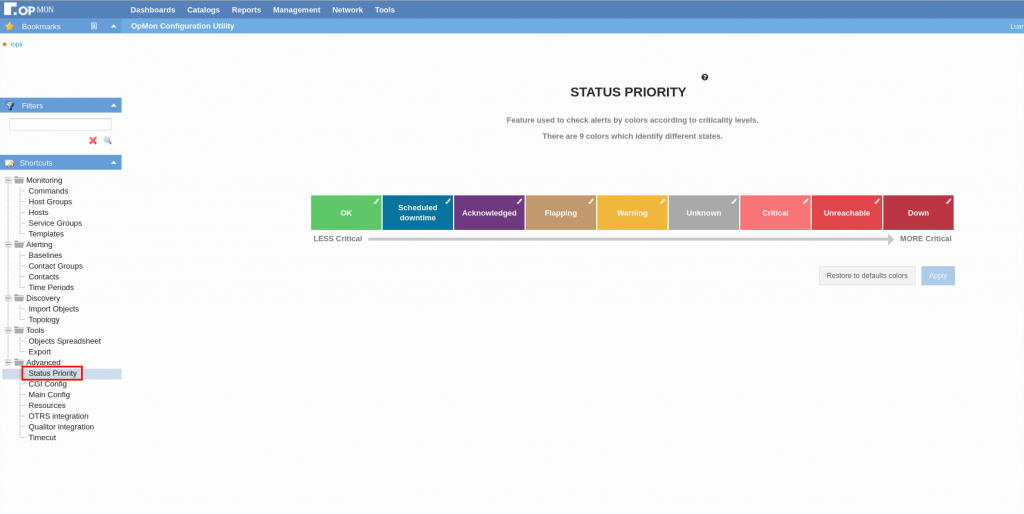
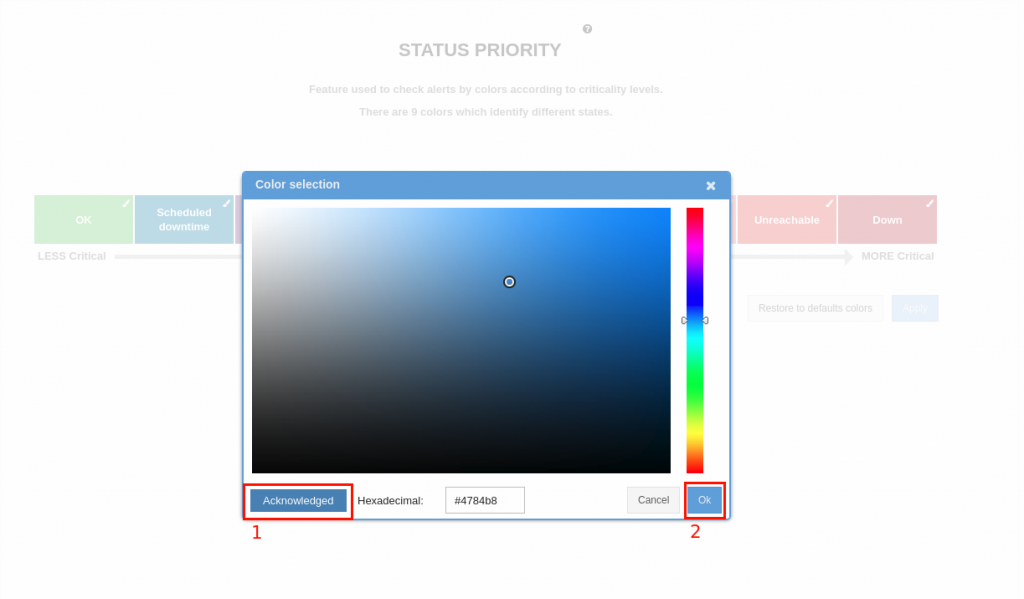
To change the color of any state, simply click on it and choose a color on the screen that will open.
- In this space is a preview of how OpMon will look;
- When you have chosen the color, just click Ok.
Once you have set up all the colors you are interested in, just click Save to have your OpMon use the colors you have selected.

To restore colors to the OpMon standard, simply click the restore button (1) and then click Apply (2).