Objective
Describe how to create a new time period and bind it to a item.
Target audience
OpMon administrators and IT teams who are familiar already with maintenance of elements on OpMon.
Requirements
- You must have access permission of type opmonamdin.
Solution
OpMon supports the creation of differents types of time periods.
When we bind a time period to an item means that the item it will be checked and notified just at that the period specified.
You can apply a time period to a template, host or service. When you bind it on a template all the hosts and services will inherit the time period from template, but they can are changed when necessary on a host or service especific.
1 – Creating a new time period
a) Clique no módulo “Ferramentas“, logo após no submodulo “Configurações“, veja:

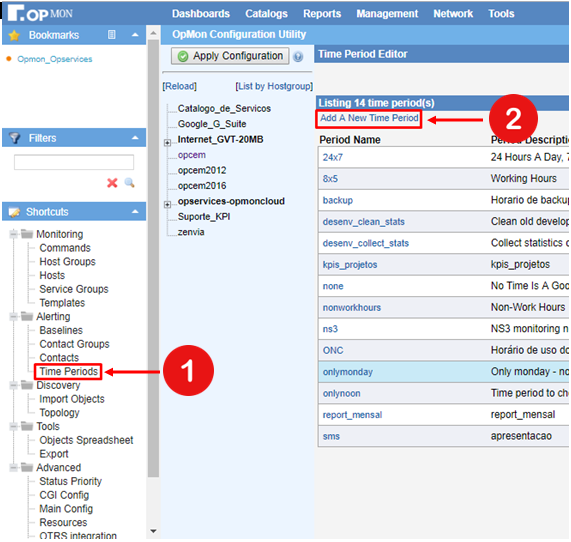
b) Na área de atalhos (lado esquerdo da tela) clique em “Time Periods” e logo após em “Add A New Time Period“, veja:

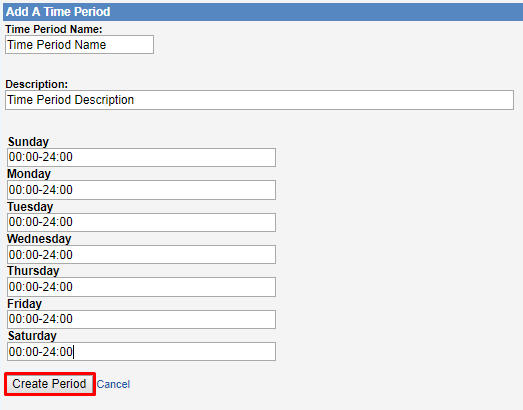
c) Agora você deve definir o nome do Time Period, a descrição e os filtros para cada dia da semana e clicar em “Create Period“, veja o exemplo abaixo:

2 – Vinculando o Time Period a um elemento no OpMon
a) Ainda na área de configurações, selecione o elemento (host, template ou serviço) e na área aba “General” defina o time period desejado e em seguida clique em “Update” conforme é mostrado no exemplo abaixo.

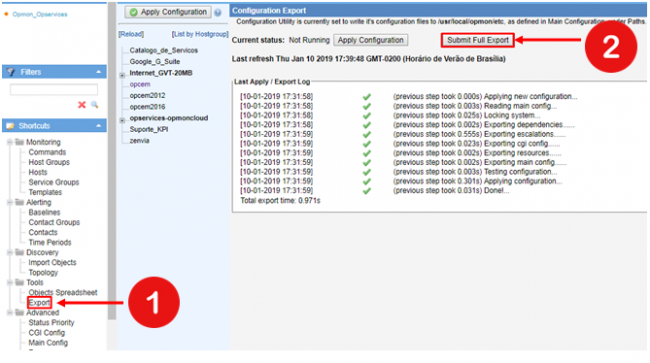
b) Feitas as vinculações nos elementos desejados, faça o export para efetivar as alterações realizadas. Para isso, basta clicar em “Export” (localizado à esquerda) e após, clicar em “Submit New Export Process”

