
Objective
It`s a step by step guide to start OpMon up.
Target audience
New users having first contact with OpMon installation and interface that would like add new devices to monitoring quickly.
Requirements
- OpMon 8.0 or higher.
Solution
Follow the steps below to you how to start the wizard on OpMon 8.
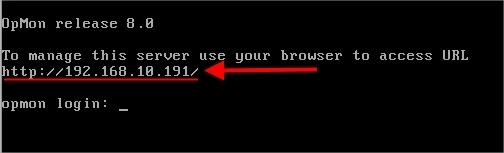
After sucessfully installing OpMon, yu can browser the OpMon`s initial wizard pointing your browser to the IP provided during the instalation. Check out the exemple below to find the IP your OpMon installation has.
Accessing OpMon for the first time
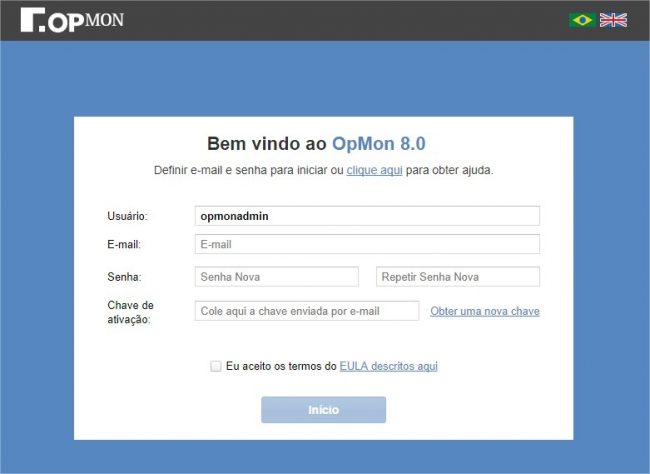
When accessing opmon interface for the first time (using internet browser) you will see a screen similar to the one below. Enter upur e-mail address, set opmonadmin`s password and input the key that you received on your e-mail during the download process of OpMon (click here if you have doubt about OpMon activation key).
Credentials have been set succesfully! Remember that in yout next access OpMon you will need to use user opmonadmin and the password chosen for you.
Discovering devices on your enviroment
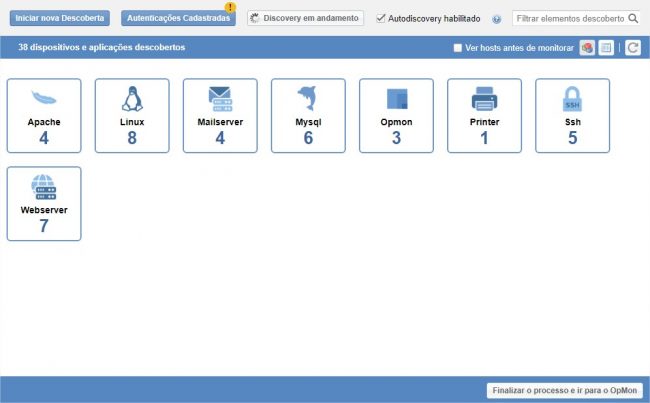
After you clicking on “Start”, you will be redirected to the Discovery area. You will see all elements discovered automatically by OpMon in this area. From here, you will be able to add elements to the monitoring using OpMon Monitoring Models technology.
You will see a simliar screen as the one shown below:
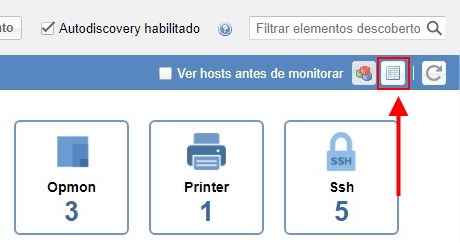
If you would like see the complete list of items, click on “Detailed view”, according to example shown below:
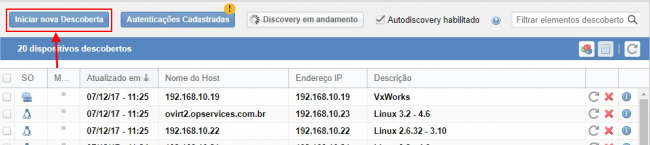
Click on “Start new discovery” to discover other Ips ranges of your network, IPs or host names.
You will see a screen similar to the one shown below, at where you should inform the IP ou range that you wish to find out. Take note that you can insert more than one IP, just split them with commas. It is also possible to use the signal “-” between the IPs, for exemple: 192.168.10.1 – 192.168.10.50.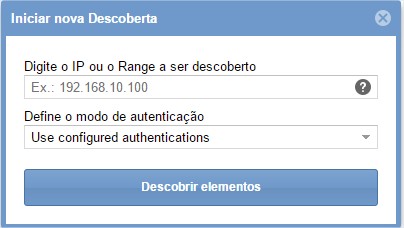
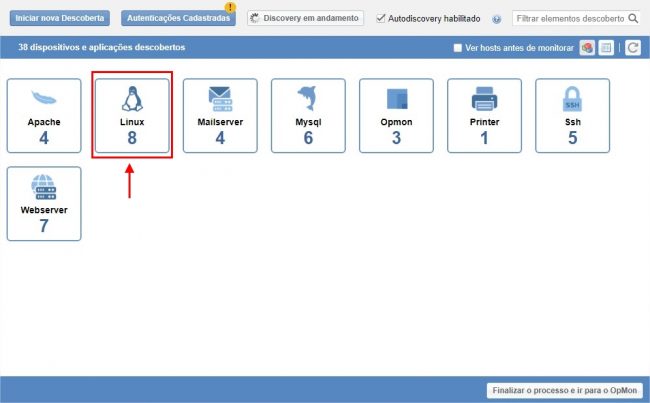
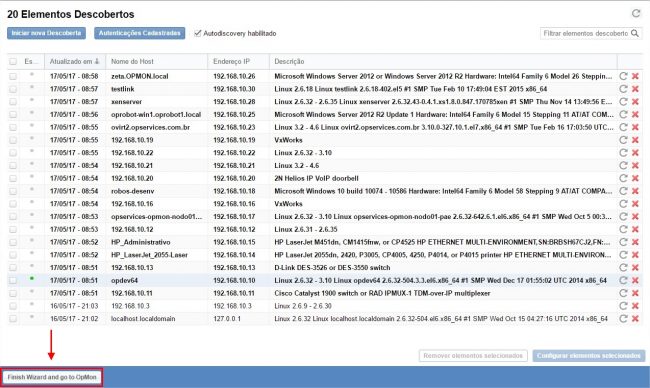
As soon as the elements are discovered, they will be shown in the central area of the screen, and can be easily identified by date of discovery, see example below:

Select one or more items that you want add to monitoring, or use the Group view, clicking on “Grouped by tag” and select the Group that have the items that you want to monitoring.
Click on “Grouped by tag”:

Select the tag group:
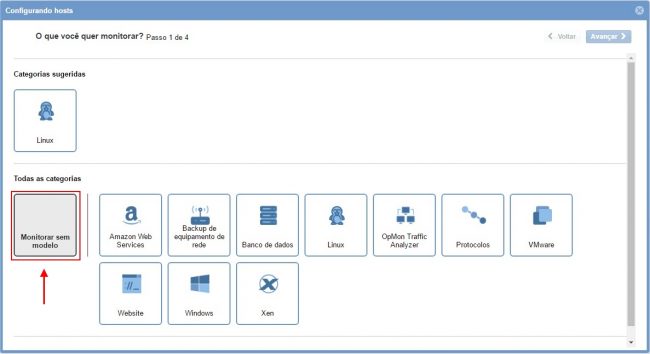
In order to simplify the process of adding elements to the monitoring, OpMon will recommend the usage of specific monitoring models for each kind of devices. It is possible to add elements without using models, just click on “monitoring without model”. For further information about models click here. The usage of models simplify the device`s configuration process, however we will demonstrate how to add itens without using models in this example.
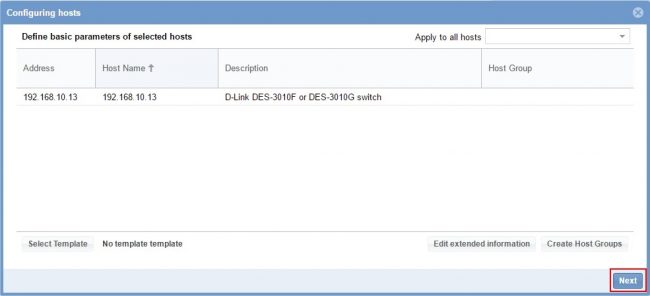
After clicking on “Monitoring without model” you will see a screen similar to the one shown below, in this area you should set the basic parameters to the hosts selected. After defining basic parameters, click on “Next“:
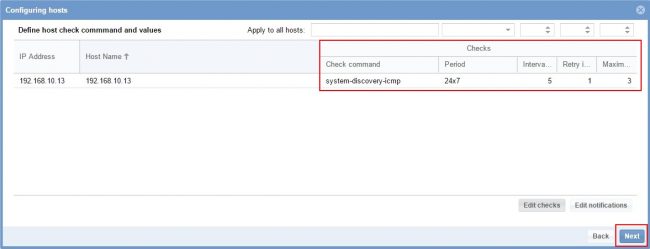
In this step, set the check command, check interval, recheck interval and máximum number of the check attempts. Then click on “Next” to proceed with the addition of the devices.
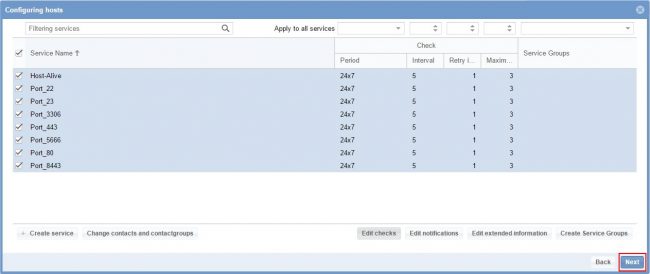
Now select the services that you want monitor, as well as their monitoring settings, like period and interval. You must also set a group and a responsible user for the itens and users that will monitoring. Then click on “Next”
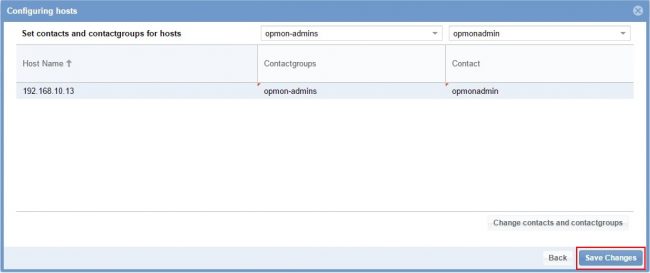
Select teams and users responsible for this hosts after clicking on “Save Changes” to finish .
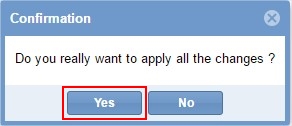
You will see a message similar to this asking if you want to apply all changes, click on “Yes”:
Now click on “Finish process and go to OpMon”
Then you will be directed OpMon home screen, where you can already see the elements being monitored and start using the OpMon.

How do i make a new Discovery?
If you want start a new discovery, just click on “Network” and after clicking on “Discovery”, check the exemple below.

Troubleshooting
If during update from an earlier version to current version the following message shows up:
aviso: /etc/mod_gearman/mod_gearman_neb.conf criado como /etc/mod_gearman/mod_gearman_neb.conf .rpmnew
Just edit the file /etc/mod_gearman/mod_gearman_neb.conf after update and check if option is set according to the exemple below:
use_uniq _jobs = off
After editing the file, execute the following command:
/etc/init.d/mod_gearman_worker restart