
Objective
Describe how to configure the /var with LVM partition within a new installation of OpMon.
Target Audience
Intended to users who want a new OpMon installation with LVM.
Prerequisites
- Aimed to CentOS 6.X operational system.
Solution
This tutorial is intended to CentOS installation and not a OpMon installation.
First, follow the initial procedure instructions from CentOS 6.x, selecting the region, the language, machine name and administrator password, as you wish.
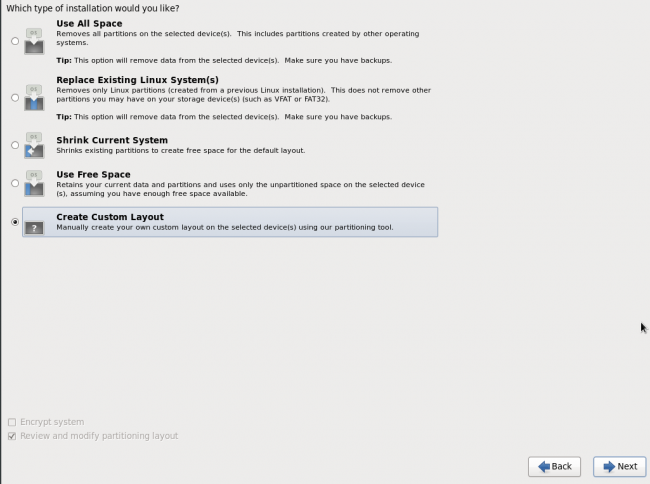
When you arrive to the disk choice, like the imagem below, select the option “Create Custom Layout”, and click in “Next“:
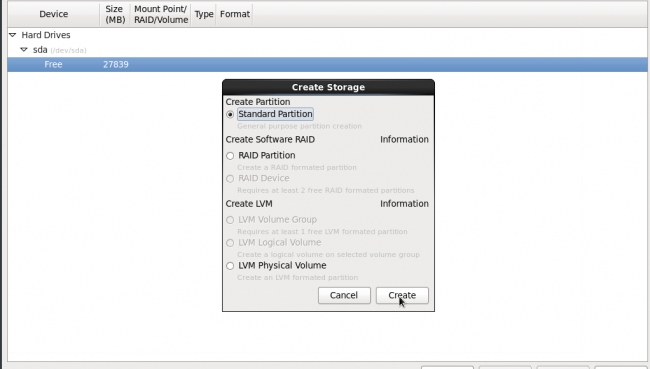
On the next step, will be displayed a screen where show all disk space available to utilization, and in this step will be necessary define the “/” partition and the LVM partition. To make this, select “Standard Partition”:
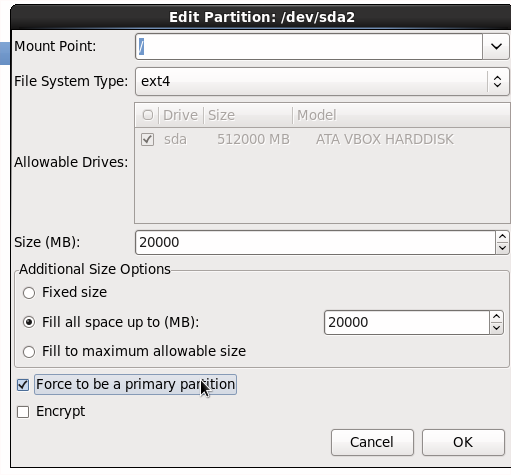
On the next screen define the mount point like “/” and his type like ext4, defining around 15GB to 20GB to this partition and define this partition to be bootable, checking the option “Force to be a primary partition” and click in OK, like bellow:
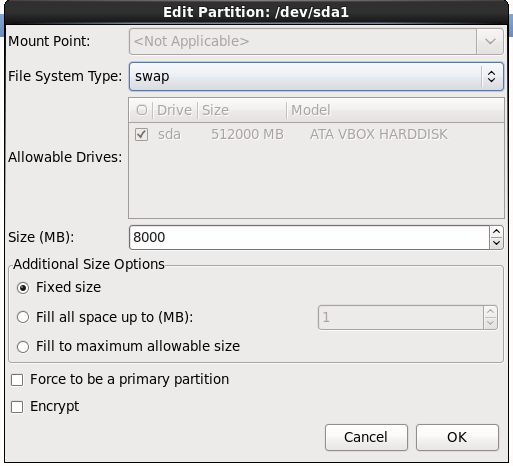
Now its necessary create the swap partition, to make that click in “Create”, select the option “Standard Partition” and define the “File System Type” like swap and define the swap space, in the example we used 8GB, see:
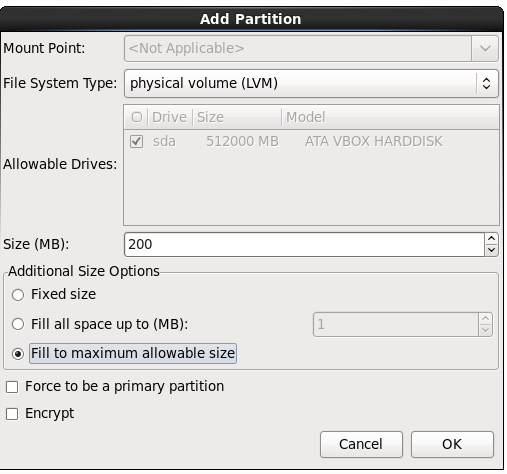
Now select the remaining space and click in “Create” and select the “LVM Physical Volume” and click in “Create“:
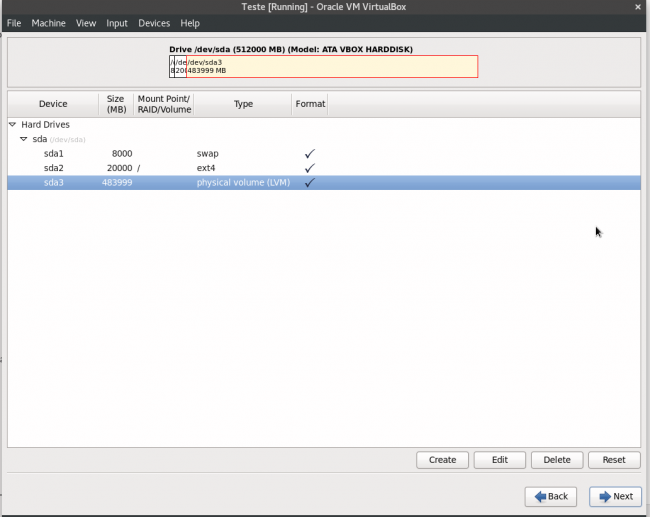
In this step will be necessary define the disk space which this partition will be use. Remembering, this disk space have to match with the minimum requisites. In “Size”, define the option “Fill to maximum allowable size” which will be attributed to /var and click in “OK”:
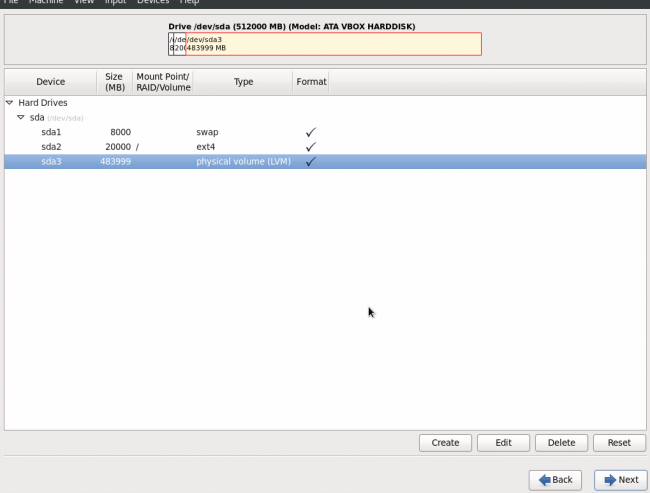
To define the LVM partition, select the disk space created and click again in “Create”:
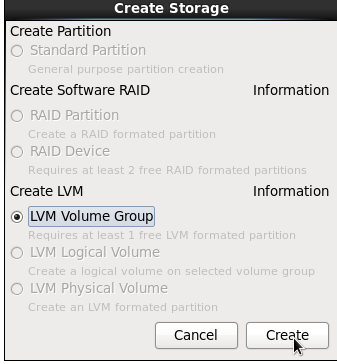
Now will be necessary define the Group which this volume will belong, to make that, select the option “LVM Volume Group” and click in “Create“:
Define the group name and click em “Add“:
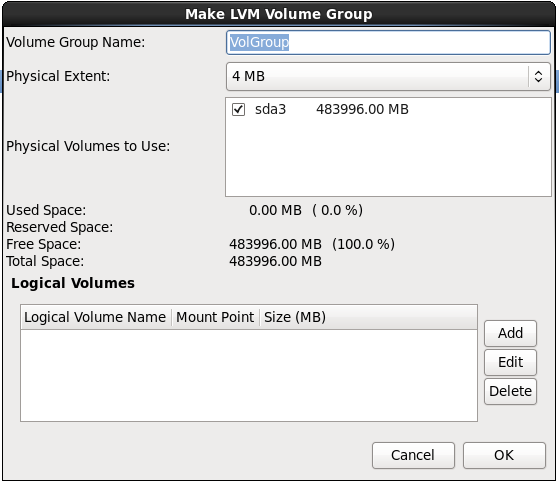
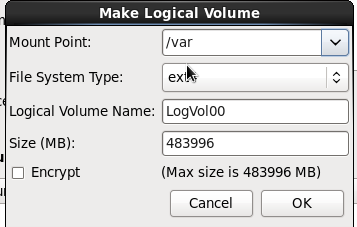
In this step we will define the mount point, select the /var and define the size which this disk will have, like the example below:
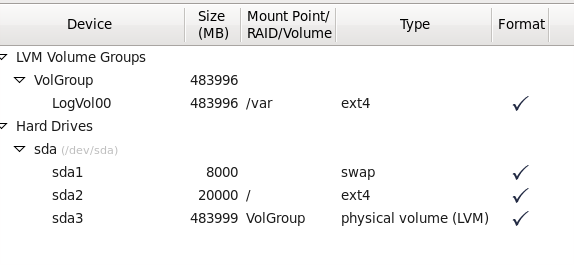
After this configuration, click in OK and must be showed a screen like below:
When this procedure are done, follow the instructions to finalize the Operational System installation and make the OpMon installation, following this post.